
xGUS Manual
1. xGUS - a helpdesk template
The xGUS portal is a template framework for a helpdesk system. It is based on the BMC Remedy Action Request system with an Oracle database for tickets, news, portal and user administration.
The portal brings a lot of features which are suitable to provide effective user support. Users can enter the portal automatically if they have their grid certificate imported into their browser, via login and password or via shibboleth. They can submit a ticket via a form and classify their problem by setting e.g. a type of problem, an affected site or a priority. The ticket gets assigned to the appropriate support unit by the First Level Support. The responsible support unit gets informed via email about open tickets. The user can choose whether he wants to stay up to date about the whole working process or only get notified if the problem is solved. Users or support staff can also use an email interface to add comments to the ticket. When replying to an email received from the helpdesk, the answer text is added to the ticket history.
Support staff can create relations between different tickets. If several tickets depend on the solution of another one, they can be marked as slaves. When the master ticket is solved, the solution is transferred to the slaves and they are solved automatically. If one ticket depends on the solution of several other tickets, these tickets are marked as children of this ticket. Only when all of the child tickets are solved, the parent ticket can be solved, too.
With the news module, which is included in the portal, maintenances, downtimes or events can be announced easily via the portal. An RSS feed for news can be subscribed by portal users to stay up to date.
Registered users can view tickets of their personal interest on their dashboard. Subscription to a ticket triggers email notifications about ticket updates for interested users who are not the submitter.
The xGUS system is a tool to track and document problems. It can be used to gain statistics about upcoming problems.
Portal administrators can customize the portal via a web interface. They can set links on the portal which are helpful for users like documentations or other relevant web pages, define the list of selectable problem types, VOs and sites and add or modify support units.
2. Access the helpdesk
The xGUS helpdesks provide access via single sign on based on shibboleth. You will be allowed to access the helpdesk using the login of your home institution (e.g. your University) through the Shibboleth authentication.
In the helpdesk login page you will see a link, e.g. “EOSC Portal AAI”, "DFN AAI" (see Fig. 1). Click on the link and you will be redirected to either your home Identity Provider (IDP) or a WAYF (Where Are You From) service where you can select your home institution for further redirection. Afterword you can insert login and password of your home institution to be redirected back to the homepage of the xGUS helpdesk.
Below are described the main steps during the Shibboleth authentication in the EOSC xGUS instance: the EOSC-portal helpdesk. For others it should be near the same.
- Step 1: User accesses the resource
The user starts by attempting to access the helpdesk hosted by a web server that has Shibboleth content protection enabled. He goes to the helpdesk login page and clicks on a link, e.g. “EOSC Portal AAI”, "DFN AAI" (see Fig. 1).
The resource monitor determines if the user has an active session and, if no, redirects him to the Service Provider in order to start the Single Sign-on (SSO) process.
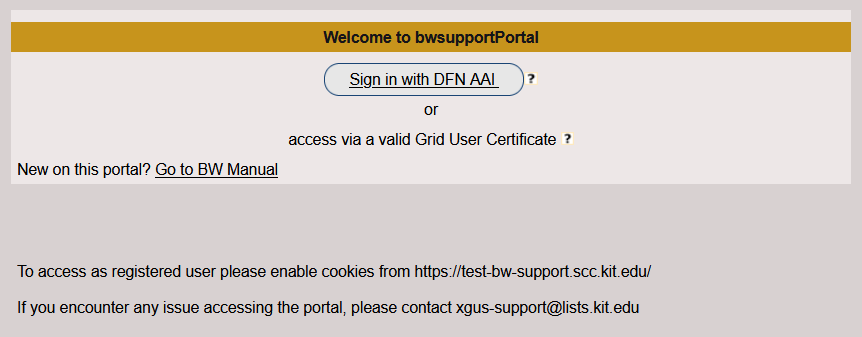
Fig. 1 – Shibboleth authentication – user access to resource
- Step 2: Service Provider issues Authentication Request
The user arrives at the Service Provider which prepares and sends an authentication request to the Identity Provider, redirecting the user to a "Where Are You From" service if configured (see Fig. 2). There users can select their home organization.
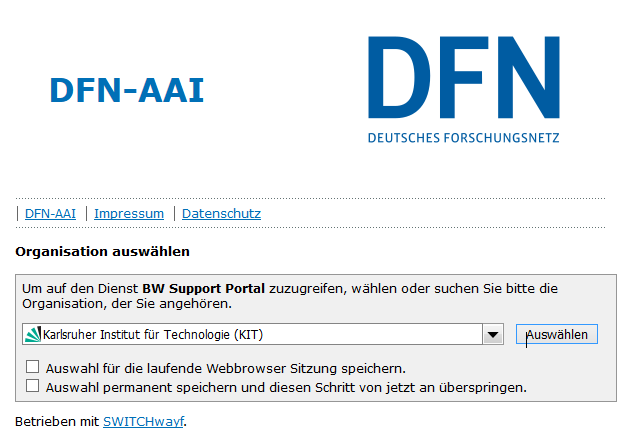
Fig. 2 - Shibboleth authentication – WAYF (Where Are You From) service of DFN
- Step 3: User Authenticated at Identity Provider
When the user arrives at the Identity Provider it checks if he has an existing session. If yes, he can go to the next step. If not, the Identity Provider authenticates him (e.g. by prompting for, and checking, a username and password) (see Fig. 3) and the user proceeds to the next step.
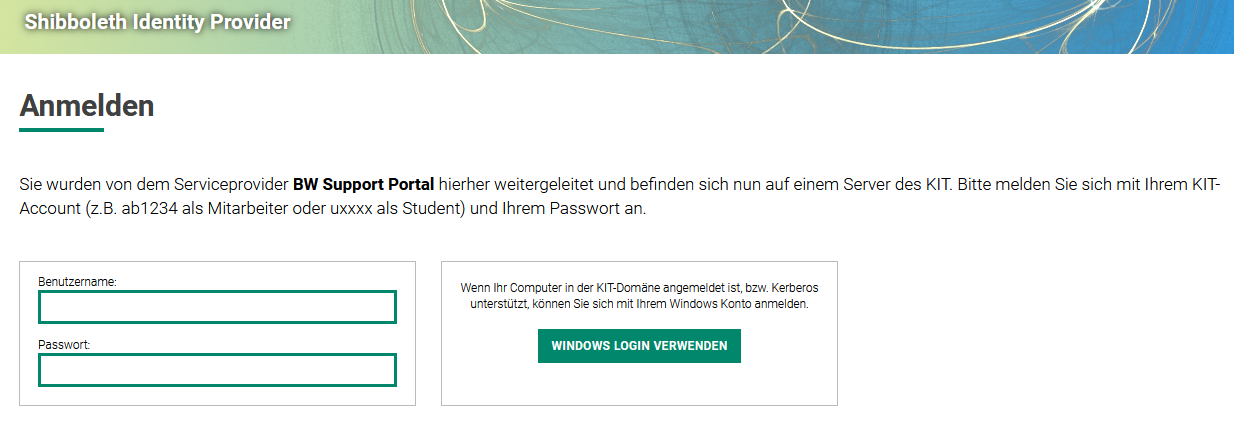
Fig. 3 – Shibboleth authentication – User authenticated at his home organization
- Step 4: Identity Provider issues Authentication Response
After identifying the user, the Identity Provider prepares an authentication response and sends it and the user back to the Service Provider. - Step 5: Service Provider checks Authentication Response
When the user arrives with the response from the Identity Provider, the Service Provider will validate the response, create a session for the user, and make some information retrieved from the response (e.g. the user's identifier) available to the protected resource. After this, the user is sent to the resource. - Step 6: Resource returns content
As in Step 1, the user is now trying again to access the protected resource, but this time the user has a session and the resource knows who he is. With this information the resource will service the user's request and send back the requested data, in this case the homepage of the helpdesk (see Fig. 4).
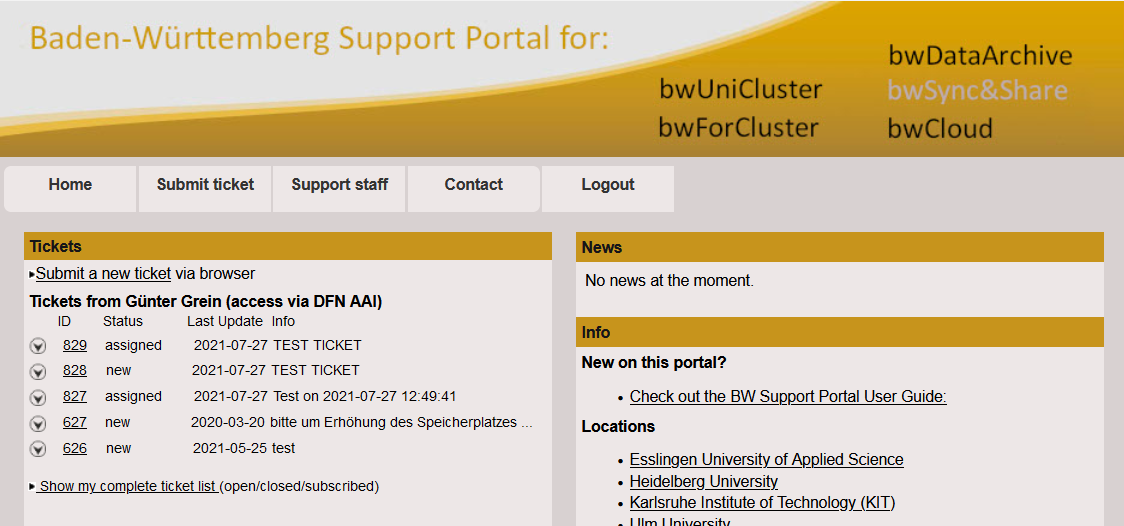
Fig. 4 – Shibboleth authentication – Resource returns content
2.1 Registration
If you want to get support permissions you need to create an account in the helpdesk click on the “Apply” link on the "Support staff" menu to open the registration form you have to fill in (see Fig. 5). Provide at least first and last name and your email. Please set the field “Do you want to have support access?” to “yes” and provide a motivation and the support unit you belong.
After submitting the registration form an email will be sent to your email address with a confirmation link. When you receive the email, click the link to confirm your email address.
If you asked for the support permission during the registration process please consult also the paragraph 7.1 Request Support Access of this document.
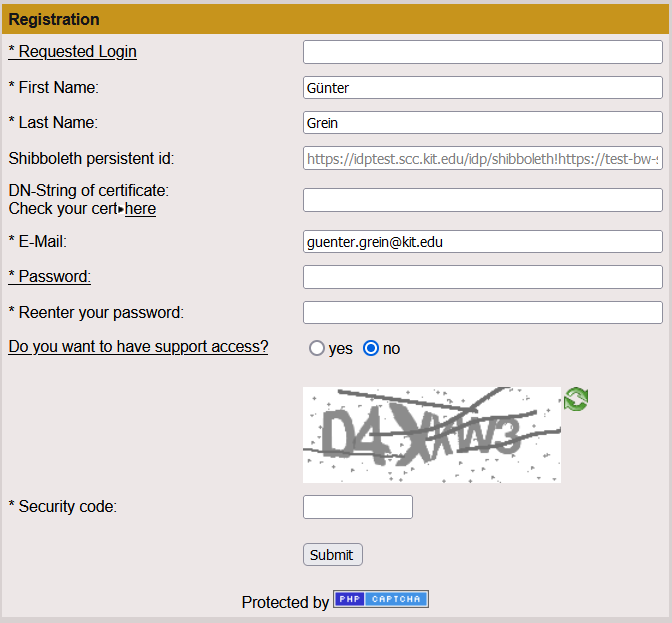
Fig. 5 – Registration form
3. Homepage
In the homepage there are two main sections separated in two different columns: Tickets and News.
The Ticket section shows the last five tickets that you have submitted with link to the ticket, status, date of last update and a short description and a list of the last 15 open tickets from all users, with links to the tickets, VO and a short description.
In the News section you can see the news generated on the portal like events or maintenance announcements. Moreover there is an Info section with link to download the helpdesk user guide and some links might be of interest for you.
If you want to submit a ticket, please check in the News section if the resource you have trouble with is in maintenance. If yes, wait until the maintenance is over and retry.
4. Ticket submit
The tickets submit form offers a set of fields which should help the user to describe his problem as detailed as possible. The submit form consists of two main sections: the user information and the issue information.
The User Information section includes the following fields:
- Name: Your name is displayed because you have accessed the portal via Shibboleth.
- E-mail: If you are a registered user, your email address is automatically filled here. If not, you have to insert your email address here.
- Notification mode: In this field you can decide if you want to be informed about every step (including assignment, changing of parameters etc.) or only on solution (including public diary entries) of the ticket.
Depending on the configuration settings there may be additional fields:
- CC to: If you want to inform somebody else about the ticket, enter an email address in this field.
- My support unit: The ticket will be accessible to all users belonging to the selected support unit.
Please choose "private" if you like to keep this ticket accessible only to yourself.
The Issue Information section includes the following fields (if they are activated on the portal):
- Subject: In this area provide a concise short description of your problem.
- Describe your issue: In this area provide a more detailed description of your problem.
- Assign ticket to: If you are an expert user and you already know which support unit is responsible for your ticket, you can skip 1st Level Support and directly assign the ticket to the responsible unit (visibility of responsible units depends on user rights).
- Attach File(s): You can upload error log files, screenshots or similar to a maximum size of 2MB. Please, avoid uploading .html, .php, or .exe files.
Although few fields are mandatory in this section, it should be filled as much fields as possible.
Depending on the configuration settings there may be additional fields:
- Ticket category: You can choose a ticket category from a drop-down list.
- Priority: Set a priority for your problem. Errors in a central service should be of higher priority than feature requests concerning a detail of software. Default priority is “less urgent”.
- Please contact the xGUS admins for a complete list of features.
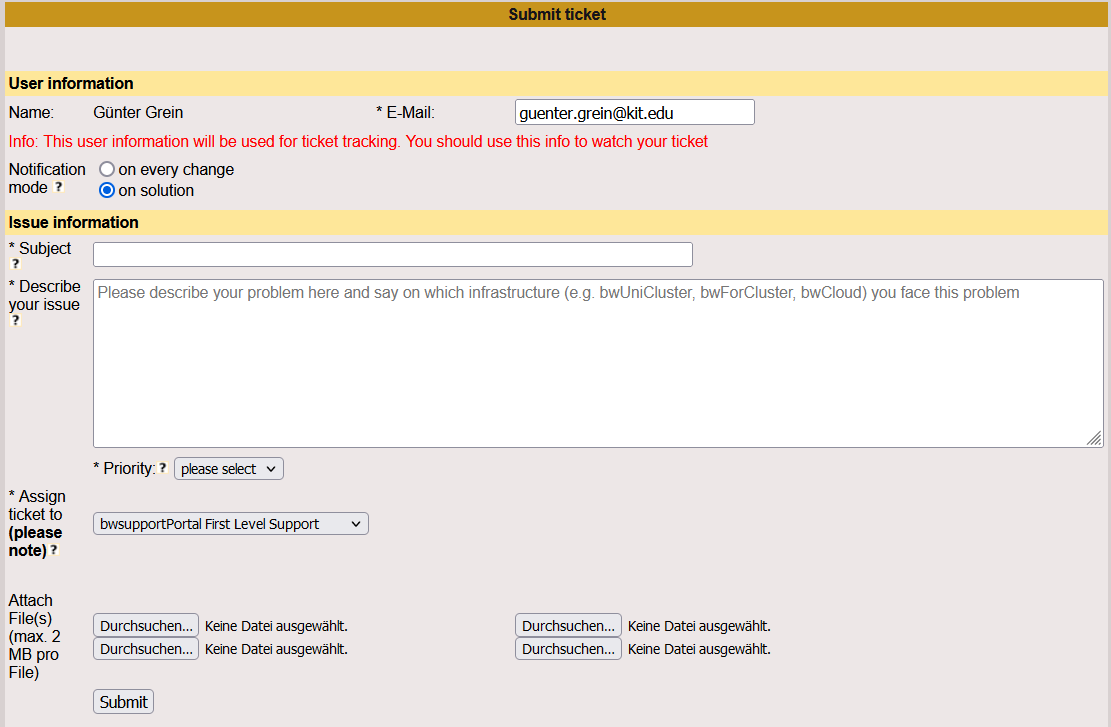
Fig. 6 – Ticket submit page
5. Ticket search
Tickets can be searched by various criteria according to the ticket parameters like “Support Unit”, “Creation date”, “Ticket ID”, “Status” etc (Fig. 7). Expanding the "Advanced search attributes" offers additional options like a "Pattern search" or "Priority (Fig. 8).
You can restrict your search also by setting a timeframe, choosing from the values “last day”, “last week”, “last month”, “last quarter” or choose a specific timeframe by setting the exact dates.
You can define which columns you want to see in the search result list choosing one or more fields in “Show columns in search result”.
In the “Order tickets by” section you can define by which parameter the result list should be sorted. "Tickets per page" allows to edit the number of listed tickets per page in the results list.
After setting the search ticket parameters you can confirm clicking on the “Search” button and a list of results will be displayed on the bottom of the page.
This list shows the tickets which match with your search criteria including links to the ticket, the responsible unit, the status, the last update and the short description.
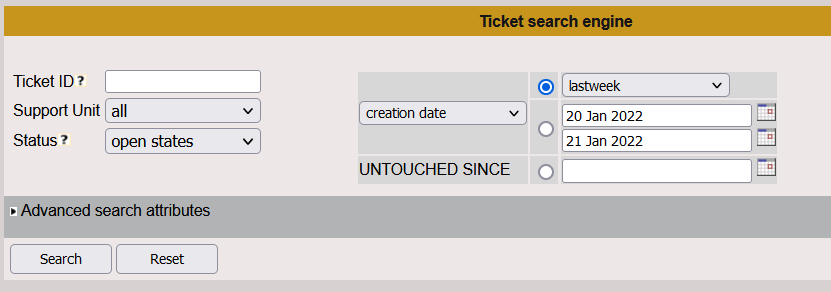
Fig. 7 – Ticket search page - Basic
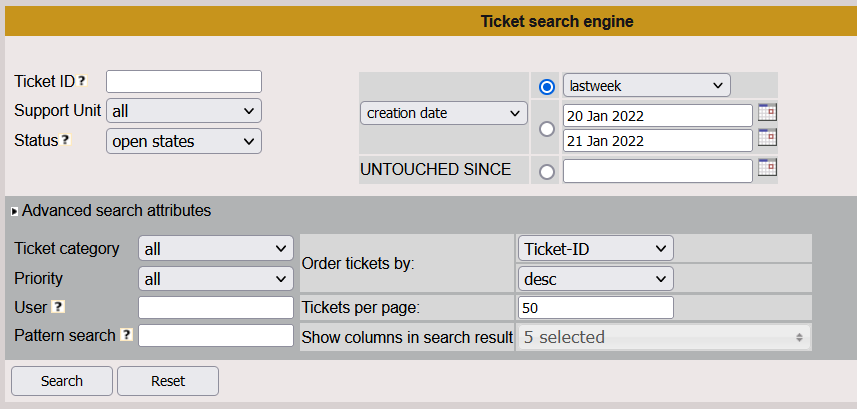
Fig. 8 - Ticket search page - advanced
6. View ticket as user/submitter
If you want to open a ticket page you can just click on the ticket id. The ticket info page will be opened. On this page you can see two main sections: the ticket information (Fig. 9) and the ticket history (Fig. 12). As normal user you cannot modify tickets except yours. If you have the necessity to modify other tickets you should apply for support staff role during the registration process or click to “Apply” under “Support staff” menu (see paragraph 7.1 Request Support Access).
6.1 Ticket Information
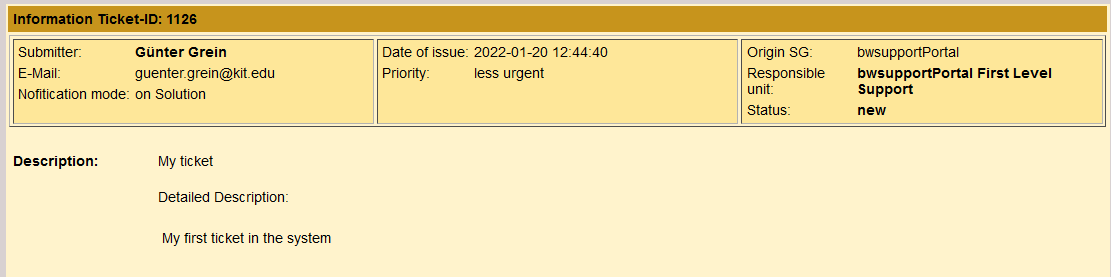
Fig. 9 - Ticket information section on the ticket page
The ticket information gives an overview about content and current status of the ticket including responsible unit and ticket parameters. If you are not the submitter of the ticket you cannot see the submitter’s name.
If you are interested in the current ticket and you would like to add it to your dashboard page, you can click on “Add to my dashboard” link on the left corner of this section.
The Description field shows the short and detailed description of the ticket, as specified by the user.
In this section you will find also the Solution of the ticket when its status is set to “solved”. The solution containing a short description of the origin of the problem and what has finally worked to solve it.
6.2 My dashboard
If you are interested in the current ticket and you would like to add it to your dashboard page, you can click on “Add to my dashboard” link on the right corner of the ticket information section.
In this section you will find also the solution of the ticket when its status is set to “solved”. You can access the ticket dashboard page clicking on “My dashboard” on the “My data” menu (see Fig. 10) only if you are registered in the system.
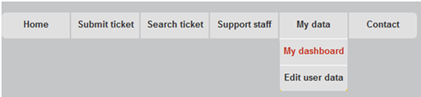
Fig. 10 – My dashboard link on the main menu
Your personal dashboard contains a list of tickets that you have chosen to add to your dashboard. You can do so if you click “Add to my dashboard” on top of a ticket.
For each ticket listed in this table (see Fig. 11) you can find a link guiding you directly to the ticket and some information: creation date of the ticket, short description, status, info about the author and the date of the last update.
You can remove a ticket from your dashboard whenever you like clicking on the icon in the “Remove ticket from dashboard” column.

Fig. 11 – My dashboard page
6.3 Ticket History
The ticket history shows all actions that have been taken to solve the ticket, with the date and time of these actions (see Fig. 12).

Fig. 12 – Ticket history on the ticket page
Each status or responsible unit change produces a history entry with the new status and responsible unit in parenthesis.
As normal user you cannot see the internal comments published in the “Internal diary” of the history.
If you want to subscribe your email to the current ticket you can check the “Subscribe to this ticket with email address <your email>” field and decide if you want to receive notifications for updates only on solution or for each change. "Internal diary" entries never go to the people who subscribed to a ticket. This field can be used by any user for participating in tickets at any time.
6.4 Ticket Modify
If you are the submitter, you can modify the ticket information, for example add some additional information or comment on a question of a supporter. You can add attachments, change the email notification behavior of the system and change some other attributes of his ticket.

Fig. 13 – Ticket modify section
You can change the following parameters:
- Change priority: Provides a dropdown-list of possible priority values.
- Add a comment: What you write here goes into the public diary of the ticket, it is visible for everyone.
- Notification mode: Here you can decide if you want to be informed about every step (including assignment, changing of parameters etc.) or only on solution (including public diary entries) of the ticket.
- Attachment: You can upload error log files, screenshots or similar to a maximum size of 2MB. Please, avoid uploading .html, .php, or .exe files.
If the ticket comes from GGUS or has ever been assigned to a global GGUS support unit, it has a partner ticket in the GGUS helpdesk with the given ID. The GGUS ticket and this ticket stay synchronized through every modification step, no matter if it has been modified in GGUS or in xGUS portal.
6.5 Verify a Solution/Reopen Ticket
If you are the submitter, you can verify the solution of a ticket. This means you are content with the given solution. Please note that the ticket cannot be changed any more after verification.
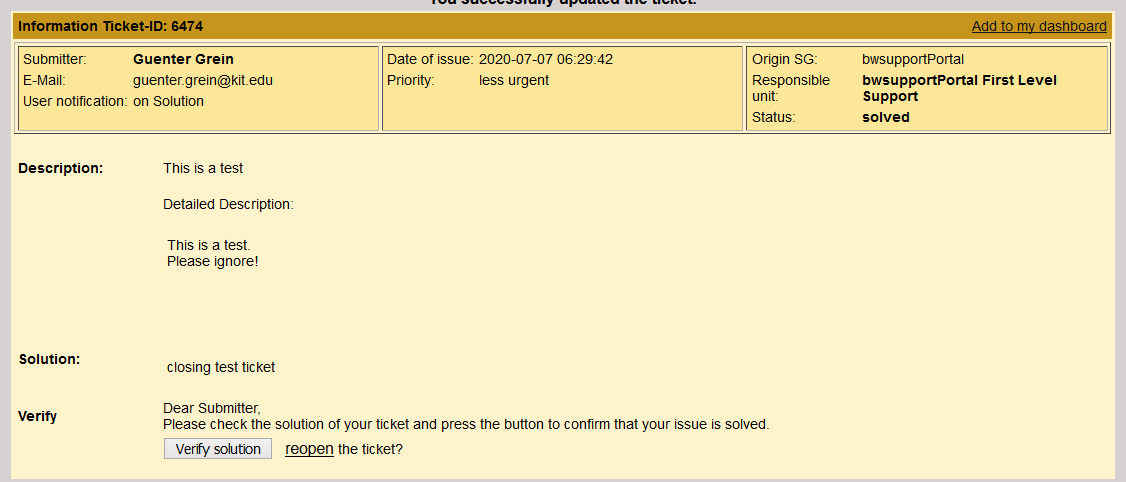
Fig. 14 – Ticket Verify
If you are not happy with the given solution, you can reopen the ticket clicking on the ‘reopen’ link. You will be guided to the modify section where you should change the status of the ticket from solved to “reopened”. Then insert an explanation why you are not satisfied with the given solution in the comment field and submit the ticket.
7. Support Staff Member
7.1 Request Support Access
To register as support staff, click the link “Apply” under the Support staff menu and fill in the registration form. Set “Do you want to have support access” to “Yes” and give a short explanation why you need this role (e.g “I am [sitename] site administrator”) and choose your corresponding support unit.
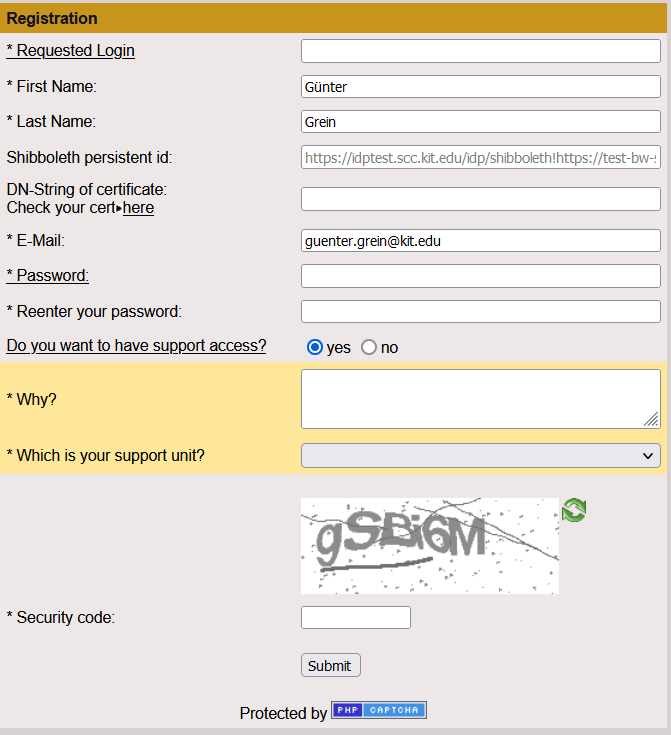
Fig. 15 – Request Support Staff
When a user administrator has confirmed your support request, you will receive an email. Now you should only reload any page of the portal and see in the navigation menu new links under Support staff section. These links depend on which permissions you are granted (see Fig. 16).
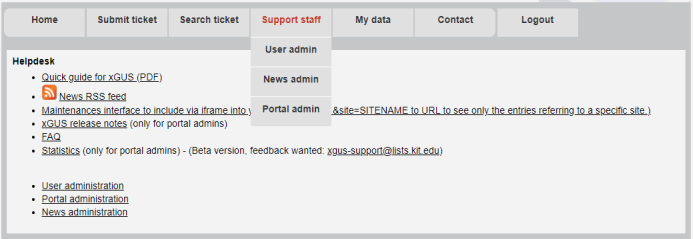
Fig. 16 – Support staff page
7.2 News administration
If you want to inform users about maintenance at your site, a conference or event, you can create a news entry which will appear on the main page.
If you have the support right, you can access the news administration section even if a small limit: you can add, edit or delete only your news. Only the news administrator can manage all news from all users. If you want to get this right please contact the xGUS team.
In this section a list of news of the last 2 months is showed with the headline, date of modification, timeframe and the status.
You can decide to change the status of the news between: hide, show, show as a warning or show as a hint.

Fig. 17 – News administration page
If you want to add a new news click on “Add News” link in the left top corner of the page. You will see the form showed in Fig. 18.
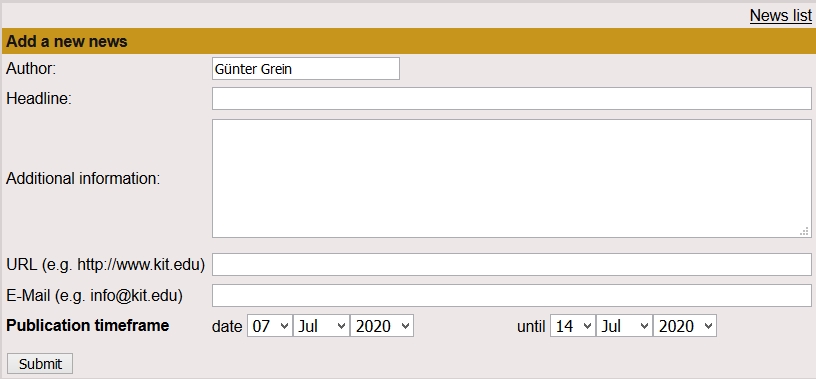
Fig. 18 – Add news
In this section you can add new news which will be displayed on the main page and on the news interfaces (links on page “Support Staff”) during the timeframe chosen. Afterwards it will disappear automatically.
Select the type of news: maintenance announcement, an event or else. If you selected maintenance, you can choose a site for which you want to create a maintenance announcement.
Select the timeframe of the maintenance or the event. In case of maintenance, an information message is automatically generated from the data you provided.
You can add some more detailed information in the “Additional Information” field and provide an URL or email address for more information.
Click the “Send” button to create the news. The news will be added in the “News” section of the homepage (see Fig. 19).
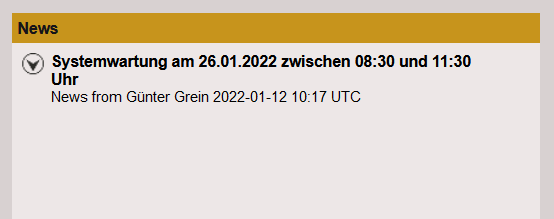
Fig. 19 - News in the homepage
7.3 View/ Modify ticket as support staff
7.3.1 Ticket Information
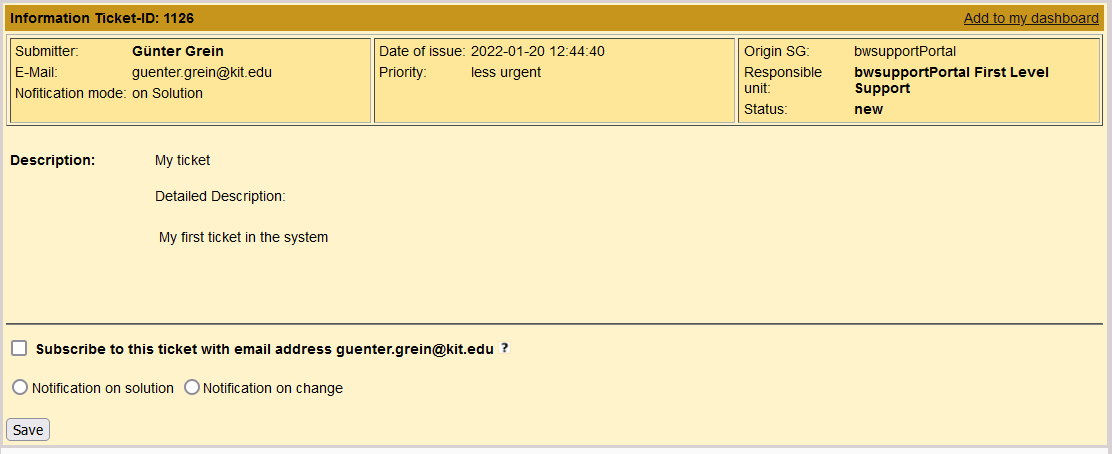
Fig. 20 – Ticket information – support staff user
The ticket information gives an overview about content and current status of the ticket including responsible unit and ticket parameters.
If you are interested in the current ticket and you would like to add it to your dashboard page, you can click on “Add to my dashboard” link on the left corner of this section.
The description shows the short and detailed description of the ticket, as specified by the user.
In this section you will find also the solution of the ticket when its status is set to “solved”. The solution containing a short description of the origin of the problem and what has finally worked to solve it.
If the ticket cannot be solved by only one support unit, it can be duplicated up to 15 times. You have to enter a comment why you duplicate this ticket. The duplicated tickets contain the same ticket information but the ticket history is not duplicated.
After duplicating the ticket, you might consider using the ticket relations parent/child or master/slave to show relations between the original and the duplicated tickets.
Tickets which are already duplicated or are in a terminal status (solved, unsolved, or verified) and ALARM tickets cannot be duplicated.
7.3.2 Ticket History
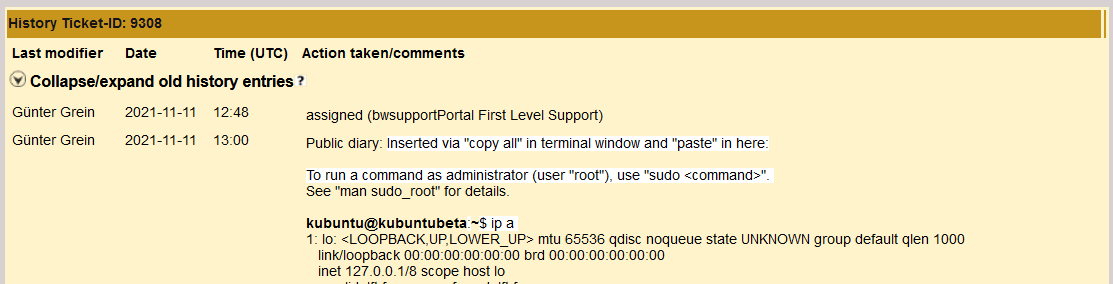
Fig. 21 - Ticket history – support staff user
Each history entry shows the name of the Last Modifier, the date and time of the change and what has been done with the ticket.
Update about status or responsible unit produces a history entry with the new status and responsible unit in parenthesis.
If the ticket gets assigned to a global support unit, it is duplicated to GGUS. The system generates an automatic message to inform about this process. If the corresponding GGUS ticket is modified, the change gets synchronized to this ticket. You can tell that the change has been done in GGUS by the (GGUS) behind the last modifiers name.
What you write into the public diary is visible to all users. The Internal Diary is visible only to users with support permission. It may contain detailed information the user does not need to know about or similar.
7.3.3 Ticket Modify
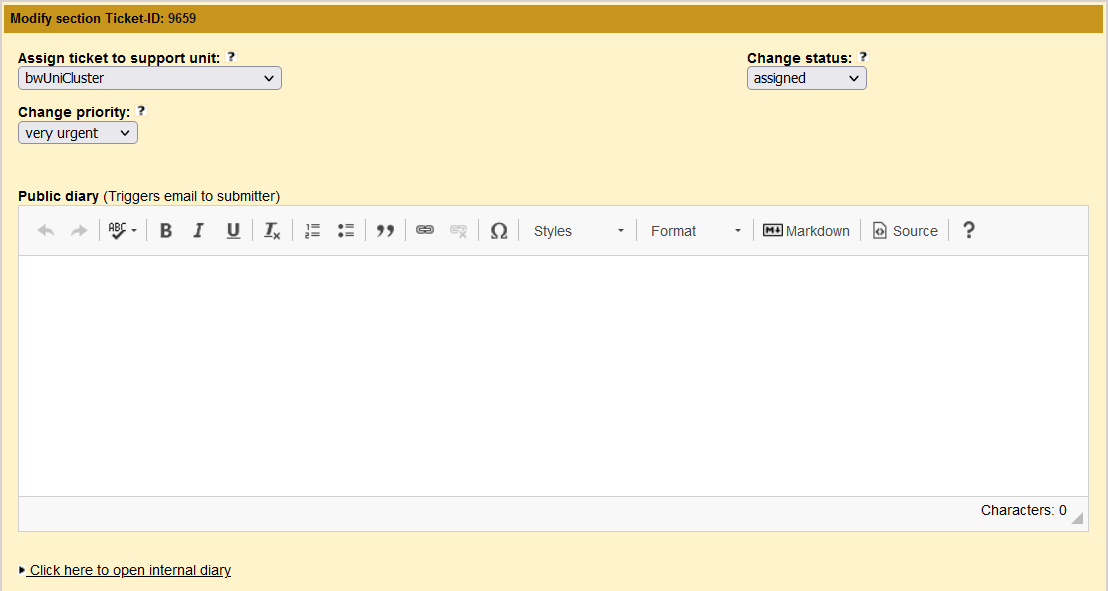
Fig. 22 – Modify section – part 1
- Assign ticket to support unit: If a ticket has to be assigned to another support unit, the appropriate unit has to be selected here.
- Change status: You can select between several open and terminal status.
- Tickets which have not yet been assigned to a support unit have status new. 1st Level Support is responsible to assign these tickets to the responsible support unit.
- If you start working on a ticket, select in progress, so the submitter can see that somebody works on the ticket.
- Select waiting for reply if you have posed a question to the user or other support staff and are waiting for an answer.
- Select on hold if you know the ticket cannot be solved for more than three days because you are waiting for a software update, a political decision etc.
- Select solved if the problem is solved and enter a solution in the solution field
- Select unsolved if the problem cannot be solved. Enter an explanation in the solution field.
- Select reopened if the ticket is on solved or unsolved and you find out that the solution/explanation is not satisfactory or the problem has reappeared.
- In verified tickets the submitter has verified the given solution, the ticket cannot be modified anymore.
- Changing of the support unit automatically sets the status to assigned.
- Change Priority: Provides a dropdown-list of possible priority values.
- Internal diary: If you want to discuss technical or sensitive details with your colleagues, enter your comment in the Internal diary. What you write here is not visible for users without support permission.
- Public diary: What you write here is visible for everybody. Choose this field if you want to communicate with the submitter.
Depending on the configuration settings there may be additional fields:
- Type of problem: Provides a dropdown-list of possible problem types.
- Notify site: Provides a dropdown-list of possible sites.
- Assign ticket to specific person: If you want to assign the ticket to a specific person in a support unit, insert the email address here. All support staff update mails will now also be sent to this address.
- Change concerned VO: Provides a dropdown-list of possible VO values.
- Change ticket category: Provides a drop-down list with possible values “Incident”, “Change Request”, “Documentation” and “Spam.
- Involve others: If you want to inform someone about the ticket, insert the address in this field. Notification about the ticket will be sent out once to this address
- VO specific problem: If this is a VO specific problem, related to VO specific software/services etc., set the flag here. The Internal Diary is visible only to users with support permission. It may contain detailed information the user does not need to know about or similar.
- Change CC recipient:: Allows changing the mail address specified during ticket submit for notifying any person about a ticket submission.
- Subject: Allows changing the subject of a ticket.
- Subscription: If you want to stay informed about this ticket via email notification even if you are not in the responsible support unit, set the flag here and choose if you want to be notified on solution or on every change.
- Ticket relation section: If you click here, the ticket relation section opens. Check next page for more information.
a. Master/Slave: If the solution of this ticket would also solve one or several other tickets, mark it as master. If this ticket depends on the solution of a master ticket, mark it as slave and select the corresponding master. One master can have several slaves. A ticket cannot be master and slave at the same time. Solving the master automatically transfers the solution to the slaves and sets them to solved.
b. Parent/Child: If a ticket depends on the solution of several other tickets, these tickets can be marked as children to the parent ticket. Only if all child tickets are solved the parent ticket can be solved.
c. Cross reference: If you want to reference one or several other tickets, type in the ID here. If you do so, a link to that ticket will show up here. In the referenced ticket there will show up a link to this ticket in the same place.
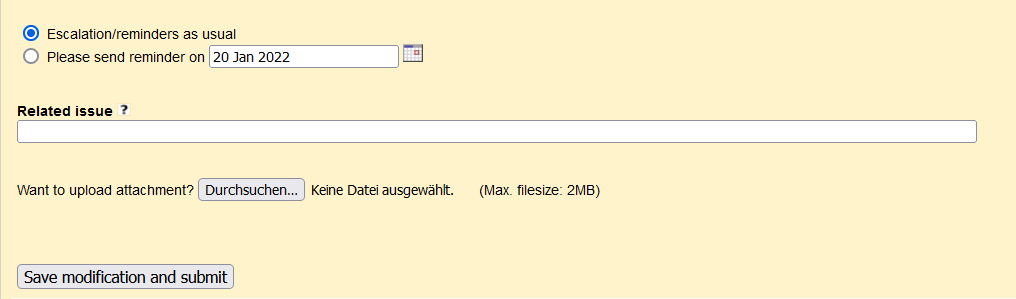
Fig. 23 – Modify section – part 2
- Escalation/reminders
a) “Escalation/reminders as usual” means that you support unit receives an email with a list of all open tickets for your support unit twice a week.
b) If you set the ticket to “waiting for reply” or “on hold” and select “Please send reminder on …” you will be reminded about this ticket at the given date. You might use this feature if you are waiting for an external software update etc. - Related Issue: If you want to document a link which is related to this issue, e.g. a ticket in a different ticket system/bug tracker, insert the link here.
- Attachment: You can upload error log files, screenshots or similar here to a maximum size of 2MB. Avoid uploading .html, .php, or .exe files.
8. Portal administration
The Portal Administration section is the tool that portal administrators use to set the list of sites, VO, type of problems, support units, main links and appearance of the portal. Moreover, it is used to customize the layout of some pages such as the visibility of fields in ticket submits page or ticket search page. Portal administrators have the privilege also to add, edit or delete F.A.Q. (see paragraph 10.9 ) and Release notes (see paragraph 10.10).
To access the portal admin section, you must be a user with the correct permission set. If you want to get this right please contact the xGUS team. Once you enter the helpdesk, you will see the “Portal admin” link under the “Support staff” on the navigation menu. Click on this link to access the portal administration section (see Fig. 24).
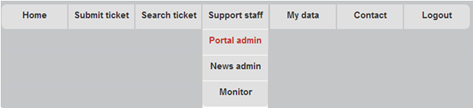
Fig. 24 – Portal administration link in the main menu
The Portal Administration section is organized according to the following categories of tasks:
- Edit support units
- Edit support staff links
- Edit homepage links
- Edit stylesheet
- Edit layout
- Edit multilanguage
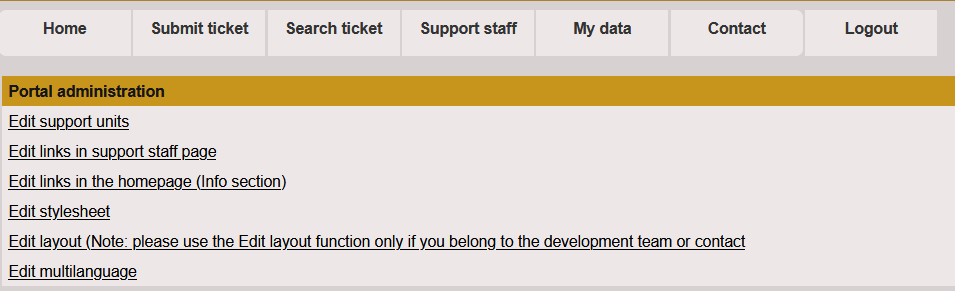
Fig. 25 – Portal administration page
8.1 Edit support units
If you want to add, modify or remove support units which are displayed in the drop-down menus of the Ticket Submit, Ticket Search pages and in the Ticket Modify section of a ticket, click on “Edit support units” link listed in the Portal administration page (see Fig. 26).
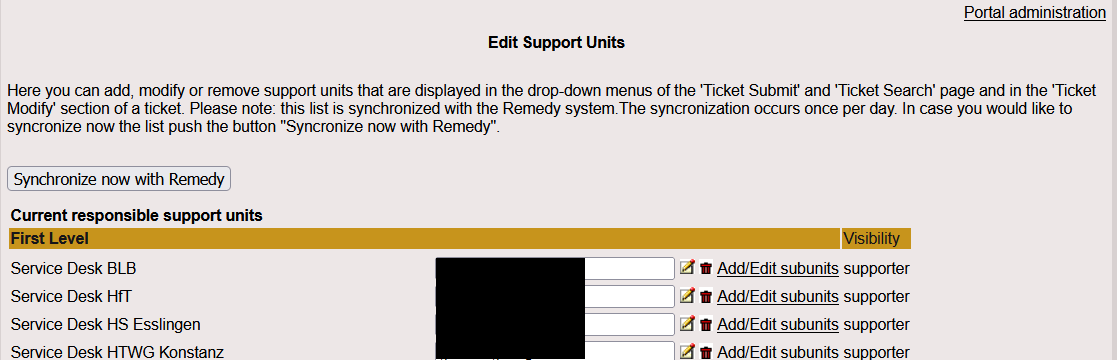
Fig. 26 – Edit Support Units page
To edit an existing support unit:
- Click on the edit icon in correspondence to the required support unit: the details of the support unit are displayed. An example is showed in Fig. 27
- Edit the details as appropriate. You can edit only the Email addresses or the category.
- Click Submit.
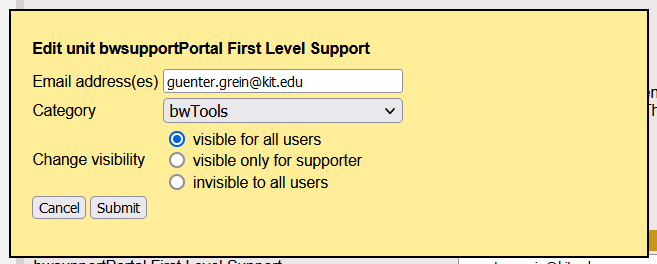
Fig. 27 – Edit support unit
To delete an existing support unit, click the trash can icon in correspondence to the required support unit. Note that this operation cannot be undone.
To add a subunit to an existing support unit:
- Click on the “Add/Edit subunits” link in correspondence to the required support unit: the window showed in Fig. 28 appears.
- Add the subunit name and email address(es).
- Click Submit.
To delete a subunit of an existing support unit:
- Click on the “Add/Edit subunits” link in correspondence to the required support unit: the window showed in Fig. 28 appears.
- Select the subunit name from the “Remove subunit” list.
- Click Submit.
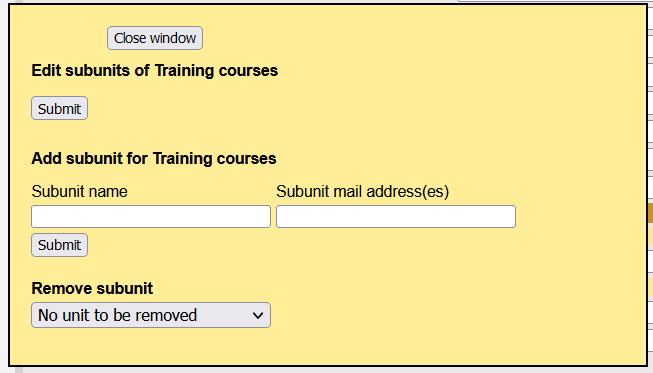
Fig. 28 – Edit or delete subunit
To add a new support unit click on the link “Click here to add a support unit” in the bottom of the “Edit Support Units” page (see Fig. 29).
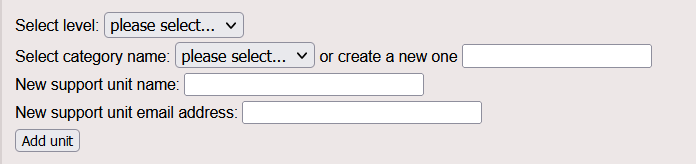
Fig. 29 – Add a support unit form
Here you can set the support unit name, the support unit email address(es), the category under which the support units should appear by either choosing one from the existing or by setting a new category. If the list is empty, you have to define a new category.
8.2 Edit Type of problems
This feature is disabled in system configuration by default. It needs to be enabled actively.
If you want to add or remove type of problems from the list that is displayed in the drop-down menus of the Ticket Submit, Ticket Search pages and in the Ticket Modify section of a ticket, click on “Edit type of problem” link listed in the Portal administration page (see Fig. 25).
In the “Edit Type of Problems” page (see Fig. 30), you can add a new type of problem in the “Add Type of Problem” field and set the category under which the problem should appear by either choosing one from the existing or by setting a new category. If the list is empty, you have to define a new category. Then click the submit button.
If you want delete a type of problem, choose one item from the “Delete Type of Problem” list and click the “Delete!” button.

Fig. 30 – Edit type of problems page
8.3 Edit sites
This feature is disabled in system configuration by default. It needs to be enabled actively.
If you want to add or remove sites from the list that is displayed in the drop-down menus of the Ticket Submit, Ticket Search pages and in the Ticket Modify section of a ticket click, on “Edit sites” link listed in the Portal administration page (see Fig. 25).
In the “Edit sites” page (see Fig. 31), you can add a new site in the “Add new Site” field and set the category under which the site should appear by either choosing one from the existing or by setting a new category. If the list is empty, you have to define a new category. Then click the submit button.
If you want delete a site, choose one item from the “Delete site” list and click the “Delete!” button.
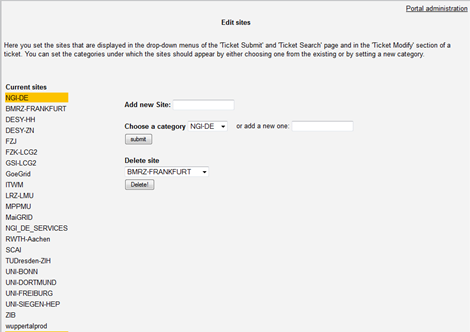
Fig. 31 – Edit sites page
8.4 Edit VOs
This feature is disabled in system configuration by default. It needs to be enabled actively.
If you want to add or remove Virtual Organizations from the list that is displayed in the drop-down menus of the Ticket Submit, Ticket Search pages and in the Ticket Modify section of a ticket click, on “Edit VOs” link listed in the Portal administration page (see Fig. 25).
In the” Edit VOs” page (see Fig. 32), you can add a new VO in the “Add VO” field and click the submit button. If you want delete a VO, choose an item from the “Delete VO” list and click the “Delete!” button.
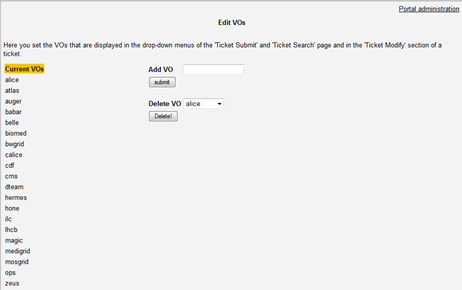
Fig. 32 – Edit VOs page
8.5 Edit Support Staff Links
If you want to set the links that are displayed on the “Support Staff” page click on “Edit Support Staff Links” link listed in the Portal administration page (see Fig. 25).
In the “Edit Support Staff Links” page (see Fig. 33), you can set the link name in the “Add Link name” field and the web address in the “Add URL” field and set the category title under which the link should appear by either choosing one from the existing or by setting a new category. If the category list is empty, you have to define a new one. Then click the submit button.
If you want delete a link, choose one item from the “Delete link” list and click the “Delete!” button.
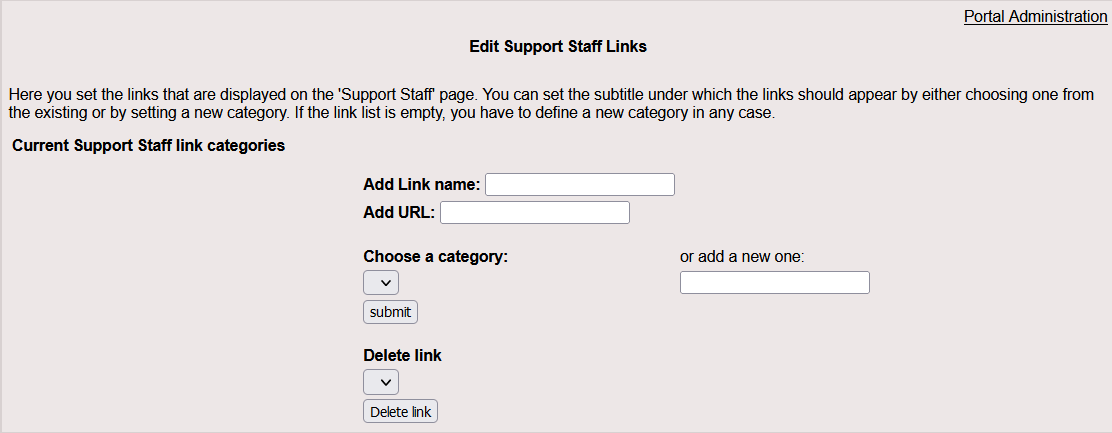
Fig. 33 – Edit Support Staff Links
8.6 Edit Mainpage Links
If you want to set the links that are displayed in the homepage under the “Info” section click on the “Edit Mainpage Links” link listed in the Portal administration page (see Fig. 25).
In the “Edit Mainpage Links” page (see Fig. 34), you can set the link name in the “Add Link name” field and the web address in the “Add URL” field and set the category title under which the link should appear by either choosing one from the existing or by setting a new category. If the category list is empty, you have to define a new. Then click the submit button.
If you want delete a link, choose one item from the “Delete link” list and click the “Delete!” button.
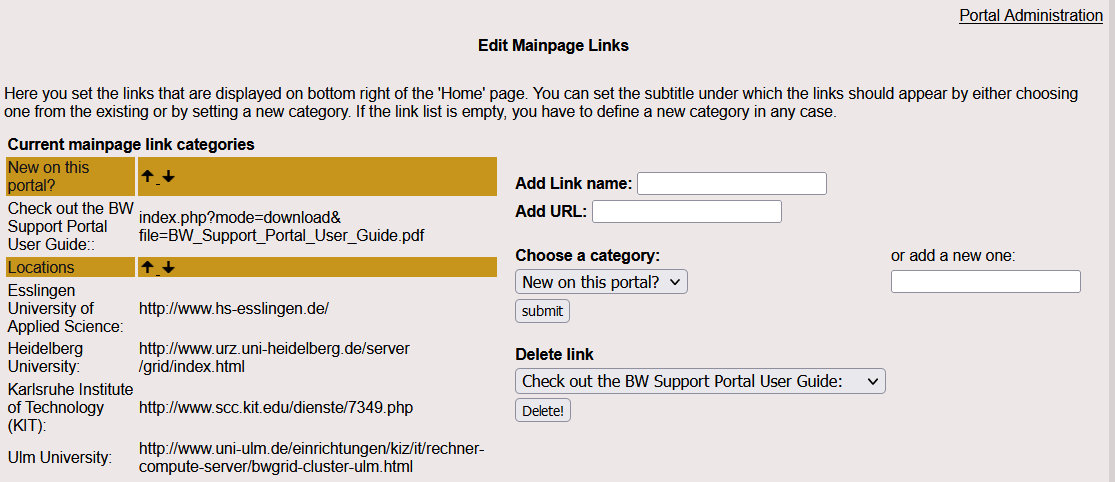
Fig. 34 – Edit Mainpage Links page
8.7 Edit Stylesheets
If you want to edit the stylesheets colors of the portal click on “Edit Stylesheets” link listed in the Portal administration page (see Fig. 25).
In the “Edit Stylesheet” page (see Fig. 35), you can set the color of the main text, big banner, background, etc, specifying the hexadecimal notation (HEX) for the combination of Red, Green, and Blue color values (RGB).
You can decide to restore the default colors by clicking on “reset colors” button in the “Default background colors” section.
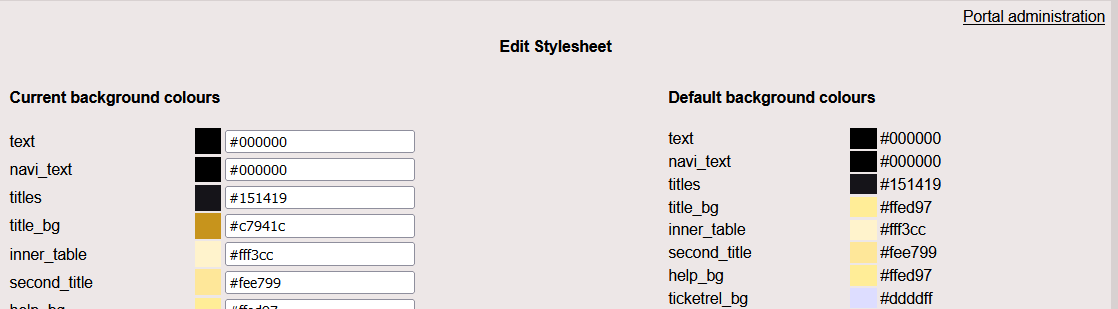
Fig. 35 – Edit Stylesheet page
8.8 Edit Layout
If you want to edit the layout of some pages of the portal click on “Edit layout” link listed in the Portal administration page (see Fig. 25).
In the “Edit Layout” page (see Fig. 36), you can check/uncheck the checkbox in order to show/not show the fields listed. For example, you can set some fields related to the ticket information showed in "Submit ticket" and "Search ticket" page. In the section "Authentication" you can show for example the Shibboleth login in the "Login" page.
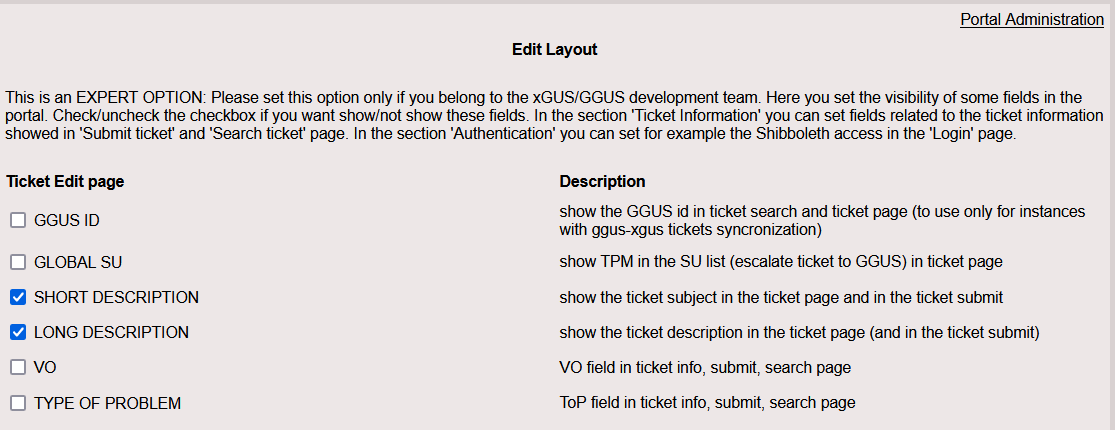
Fig. 36 – Edit Layout page
8.9 Edit Releases notes Release notes are short annotations provided usually by the development team to descrive the changes or enhancement made to the features of the xGUS system. Portal administrators can create or edit release notes by clicking the “xGUS release note” link on the Support staff page (see Fig. 16).
The page “History of release notes” is showed (see Fig. 37) and it contains the release notes for the changes in each release of xGUS. View the content of each release clicking on the release title.
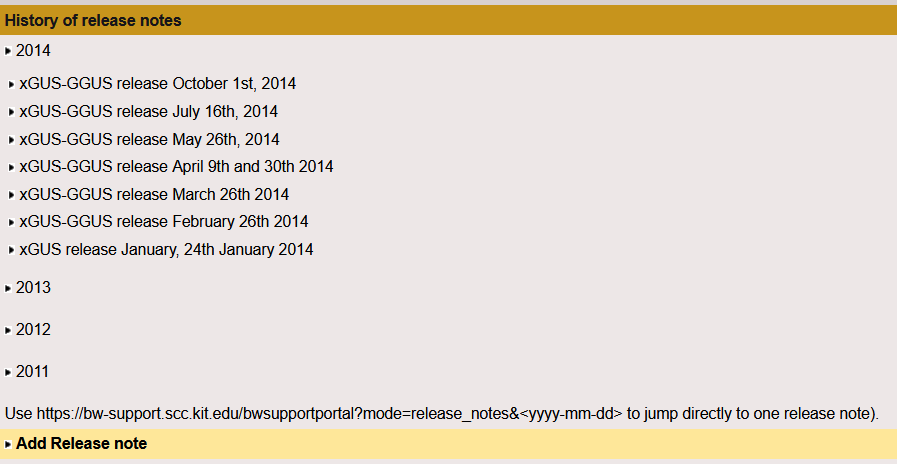
Fig. 37 – Release notes page
To edit a release note:
- Click on the release title: you will see the content of the release and the edit and delete icons (see Fig. 38).
- Click on the edit icon : the “Edit release notes” page is displayed.
- Edit the details as appropriate.
- Click submit.

Fig. 38 – Edit and delete a release note icons
To delete an existing release note click the trash can icon at the bottom of the release content. Note that this operation cannot be undone.
To add a new release note click on “Add Release note” link on the bottom of the page.
In the form presented (see Fig. 39):
- Enter the title of the release
The new release is listed on the top of the release notes history.
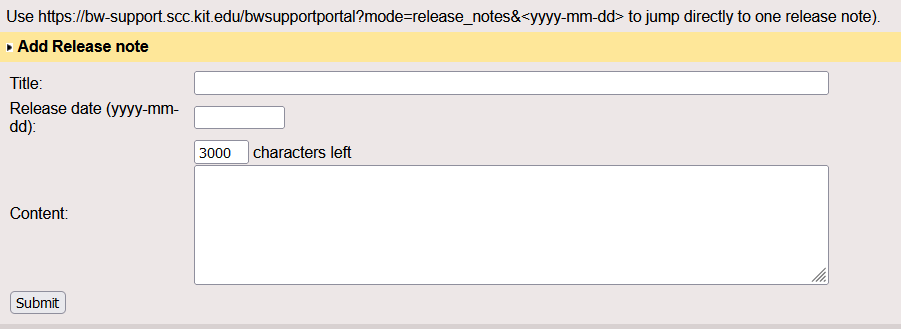
Fig. 39 – Add release note form
9. User administration
If you are a user administrator, you can use the User admin section in the helpdesk to:
- View the list of all users
- Edit or delete existing users
- Set a role or more for a user
- Add a new user
To access user administration features, select the “User admin” link (see Fig. 40) under “Support staff” section in the navigation menu.
Note that to access the User admin page, you must be a user with the right role assigned. If you want to get this right please contact the xGUS team.
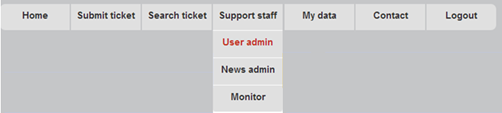
Fig. 40 – User Administration link in the main menu
9.1 View and search existing users
The two major parts of the User admin section are the search engine and the result list (see Fig. 41). At the top of the page you see a search form to search for existing user accounts. You can run searches based on the main user fields such as username, email, VO, DN string of the certificate. The search can be conducted in different ways using the sort criteria and it can be also restricted to users who have specific rights. By default, these settings are turned off.
The search returns a list of users matching your criteria. User details can be edited by clicking edit icon.
Under the Search form, the name of the users that you can manage and their main account info are listed. Each user account is unique and holds the basic account details, together with the privileges assigned. The column “Rights” show the list of roles represented by a letter, which can be:
- S: support role
- N: news administrator
- U: user administrator
- P: Portal administrator
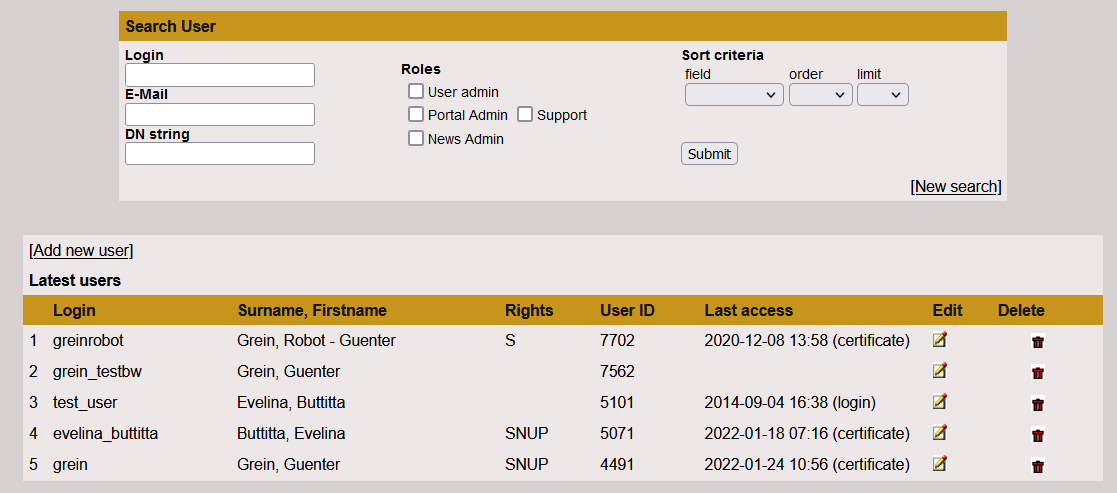
Fig. 41 – User administration page
9.2 Edit an existing user
To edit an existing user:
- Use the search engine to locate the required users.
- Click on the edit icon in the “Edit” column of the User Admin page: the details of the user are displayed. An example is showed in Fig. 42
- Edit the details as appropriate.
- Click Save Changes.
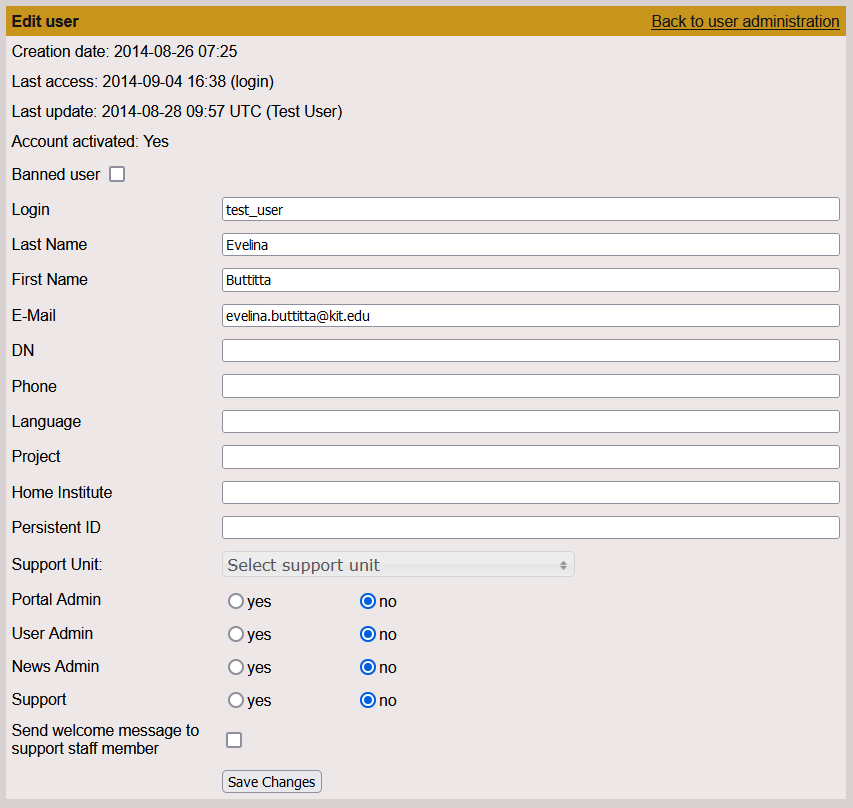
Fig. 42 – Edit User page
9.3 Edit user roles
Roles determine which interface elements (such as menu items or page sections) the user can see when he uses the application.
The standard roles are the following:
- Portal Admin: users with the portal administrator role have access to the Portal Admin (see paragraph 10). They can manage some portal settings like the list of sites, support unit, type or problem and customize the appearance of the portal. Moreover they can manage the F.A.Q. and Release sections.
- User Admin: users with the user administrator role have access to the User Admin page (see paragraph 11). They can create new users and edit user permissions and roles.
- News Admin: users with the news administrator role have access to the News Admin page (see paragraph 9.2). The can create, edit or delete all news.
- Support: users with the support role have access to the Monitor page (see 9.3 paragraph) and create, update and delete own news (see paragraph 9). They have a complete access to the ticket modify page, for example change the status of the ticket or insert internal comment hidden to public users.
Assigning a role to users gives them permission to view and where applicable, edit areas and settings in the portal. A user can be assigned more than one role.
9.4 Delete an existing user
To delete an existing user click the trash can icon at the far right in the User Admin page. Note that this operation cannot be undone.
9.5 Add a new user
User administrators can create user accounts for other users by clicking the “Add new user” link on the top of User Admin page (see Fig. 40).
In the “Add user” form presented:
- Enter at least the following information:
- Login: username of the new user
- Last name
- First name
- E-mail address
- If you want assign a role to the user, select the checkbox associated to the role.
- Click Add user
When you create new users, they receive email from xGUS staffs notifying them that they have been added to the helpdesk.
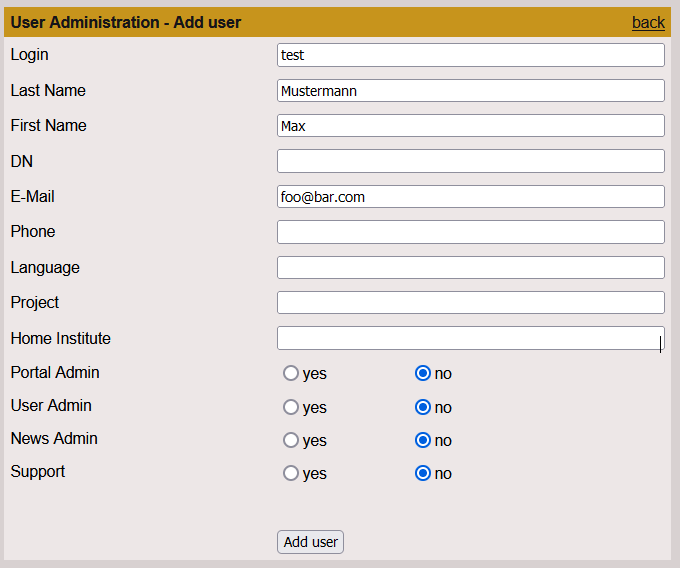
Fig. 43 – Add new user page
10. Contacting xGUS team
You can click on “Contact webmaster” link of the “Contact” menu and fill in the form (see Fig. 44) to send an email to the xGUS team with your message.
If you want to submit support requests and create a ticket in the system go to “Submit ticket” page or click on “Support request” in the “Contact” menu.
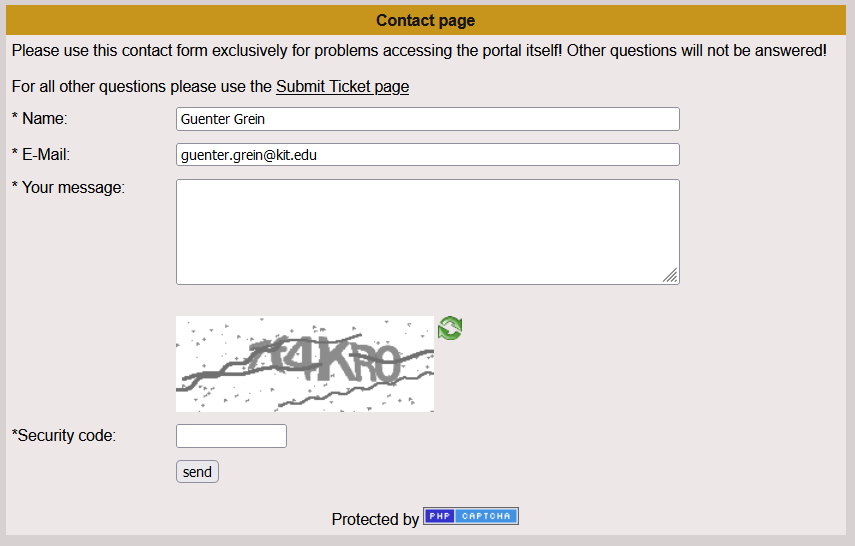
Fig. 44 -“Contact” form for sending an email to the xGUS team
Alternatively you can send directly an email to xgus-support ∂does-not-exist.lists kit edu.
12. Bibliography
http://xgus.scc.kit.edu/
http://shibboleth.net/about/basic.html